#23″Google tag manager full course” | A to Z

If you run a website, you’re probably familiar with Google Analytics, a tool that tracks user behavior on your site. But have you heard of Google Tag Manager (GTM)? GTM is a free tool that makes it easy to manage the tracking scripts and tags on your website.

In this post, we’ll go over the basics of GTM and how you can use it to track user behavior and improve your website.we’ll cover several important topics related to GTM, including how to install it on WordPress websites, what tags and triggers are, how to install Google Analytics (GA) in GTM, how to use variables, workspaces, and environments, and how to track various user interactions on your website, such as button clicks, link clicks, file downloads, and more.

What is GTM (Google tag manager) ?

Google Tag Manager is a free tool that lets you manage all your website tags in one place.

Tags are snippets of code that track user behavior on your site. For example, when a user clicks on a link or submits a form, a tag can be triggered to track that action.

Instead of adding each tag manually to your website’s code, GTM lets you add them all through its interface.

Google tag manager full course

Google tag manager @ https://www.digitalish9.com/2023/05/15/google-tag-manager-full-course-a-to-z/

How to Install GTM on WP Websites?

Installing GTM on your WordPress website is a straight forward process.

First, sign up for a free GTM account on the Google Tag Manager website. Then, create a new container for your website and copy the container code provided by GTM. Next, paste this code into the header section of your website. Once this is done, you can start adding tags and triggers in GTM.

What are Tags and Triggers in GTM?

Tags and triggers are the heart of GTM. Tags are snippets of code that track user behavior, while triggers determine when these tags are fired. For example, you can create a tag that tracks clicks on a specific button, and a trigger that fires the tag when that button is clicked.

How to Install GA3/GA4 in GTM

Google Analytics is the most popular analytics tool for websites, and you can easily integrate it with GTM. To add Google Analytics to GTM, create a new tag in GTM and select the Google Analytics tracking type. Then, add your GA tracking ID to the tag, and select the trigger that should fire the tag.

●Variables in GTM

Variables are pieces of data that can be used in tags and triggers. For example, you can create a variable that tracks the value of a form field when it is submitted. This variable can then be used in a tag to track the form submission.

●Workspaces in GTM

GTM workspaces are like virtual work environments that let you work on tags and triggers without affecting the live version of your website. You can create a new workspace, make changes to tags and triggers, and then publish these changes when you’re ready.

●Import and Export Container in GTM (Google tag manager)

You can import and export GTM containers to share them with other users or to move them between different websites. This is useful if you manage multiple websites or work with a team of developers.

●Environments in GTM

Environments are versions of your GTM container that are used in different environments, such as development, testing, and production. You can create multiple environments for your container and deploy changes to each environment separately.

●Button Click Tracking with GTM

Button click tracking is a common use case for GTM. You can create a tag that tracks clicks on a specific button and use a trigger to fire the tag when the button is clicked. This lets you track user engagement with your website’s buttons.

Link tracking is another useful application of GTM. You can create a tag that tracks clicks on specific links and use a trigger to fire the tag when the link is clicked. This lets you track user engagement with your website’s links.

If you want to track all the links on your website, you can create a tag that fires for all link clicks and use a trigger to fire the tag for all link clicks. This lets you get a comprehensive view of user.

Google Tag Manager (GTM) is a free tool that allows you to manage and deploy website tracking scripts with ease. With GTM, you can implement tracking codes for various analytics platforms, such as Google Analytics, Facebook Pixel, and other third-party tools, without touching your website’s code.

Google tag manager @ https://www.digitalish9.com/2023/05/15/google-tag-manager-full-course-a-to-z/
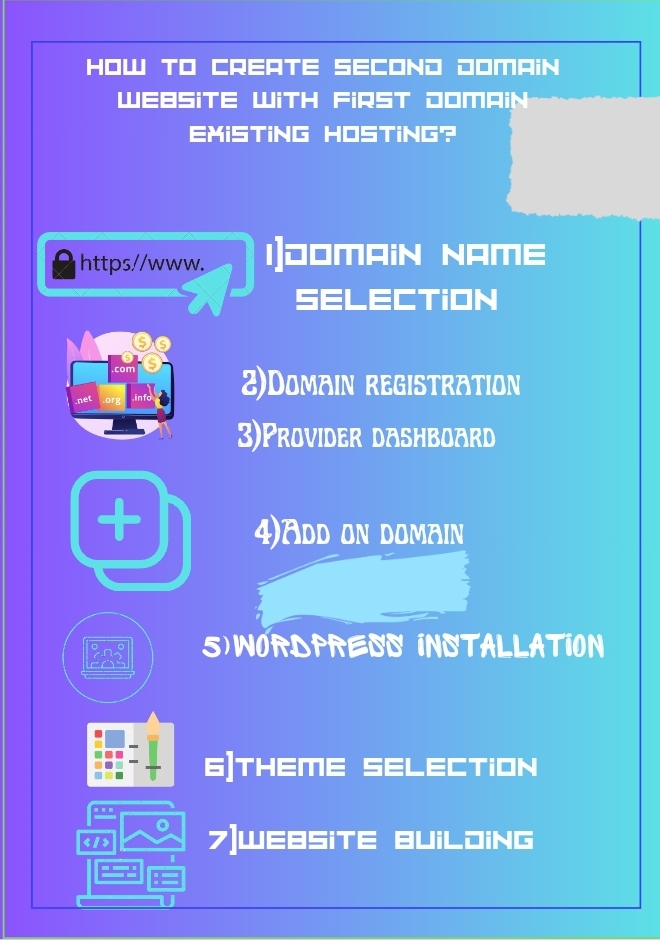
D10#”How to create second domain website with first domain existing hosting?”

To create a 2nd website and add new domain to existing hosting is complex bit with proper procedures can make it easy. Today I will share about full procedure of creating 2nd domain website and I choose Namecheap as a provider as it is cost-effective and easy to use.

Create Multiple domain website with single existing hosting ✨️

create second domain website with first hosting @ www.digitalish9.com or, https://www.digitalish9.com/2023/04/15/d10how-to-create-second-domain-website-with-first-domain-existing-hosting/

In my previous post I shared about Facebook effective travel ads Champaign . Learn more here https://bit.ly/403xxvjhttps://bit.ly/403xxvj

Table of Contents

Table of contents:

1)Introduction

2)previous post recap

3)procedure of 2nd domain website creation with existing hosting

4) conclusion

Step-by-step guide to create 2nd domain website with existing hosting:

1)Domain name selection :

A good domain name must be selected before launching a new website.A good domain name might reveal more about your company and inadvertently take on the role of your brand voice.

Select the appropriate domain name for your business. Use Namecheap to select a domain name for your business.

They have this feature that will help you to select right one without being confusion. Visit: https://namecheap.pxf.io/daa0y7

2)Domain registration:

Visit namecheap and type your domain name of choice into the search field.If it’s available, choose a domain ending in.com,.net,.org, etc. from the list.

After choosing an item to add to your cart, proceed to the checkout page and, if applicable, use a discount code.

When purchasing a domain, you can purchase SSL at the same time. You will receive it at the domain page, where you can also choose from a variety of other name products.

Many people use pioneer card to pay for this type online payment . If you also want to pay by pioneer card visit: https://bit.ly/3jroMvI .

After order completion you will get payment receipt email . Then go for next step.

3) namecheap dashboard:

Visit your Namecheap dashboard and verify the new domain that you recently purchased. Go to the DNS and name server option on the following screen by clicking the manage button.

Click on any hosting that you previously purchased or shared web hosting. After that, click the signature sign to save it.

4) Add on domain:

On the cPanel, go to the domain section and click the add-on button. On the following page, enter the domain name you purchased and created.

5)wordpress installation:

As soon as you return to the Namecheap dashboard, click the prior domain hosting link to access the cPanel option.

Now enter your admin name, installation email address, and admin password. You must check your email before continuing because this email will function the rest of the time.

To use it during admin login, copy the password and save it in notepad. On installation, click. It will display congratulations for successful installation and send a copy to the installation email you provided.

6) theme selection:

Go to your new website’s address and, if it is live or active, it will appear in searches. Then, go to the Wordress dashboard and select a theme and a website that is tailored to your business.

7)Website building:

Create your website right now using our site builder. Visit the plug-in menu, select add new, and then select Elementor, the most popular website builder, from the search box and

After installation, turn it on, go to the Elementor settings, and finish designing your website.

Lastly to say, to create multiple website come with many responsibilities because you need to be persistent .

Working on numerous projects at once can have a negative impact on productivity, but if your first website is successful and you are confident and able to manage your time well enough to work on multiple 2nd or 3rd websites, you should go for it.

If you like to read digital marketing, content writing, SEO related contents subscribe our newsletter @ www.digitalish9.com .

Follow us on Facebook @ https://bit.ly/416fPbM Subscribe our YouTube channel @ https://bit.ly/41vmvA8

For digital marketing, content writing, SEO services inquiry visit: https://bit.ly/43z5PJK

Fort shirt design inquiry visit: https://bit.ly/3KAKBmd

For E-Book collection visit: https://bit.ly/3zYSZXB

Create Second domain website with first domain hosting @ www.digitalish9.com or, https://www.digitalish9.com/2023/04/15/d10how-to-create-second-domain-website-with-first-domain-existing-hosting/